This article explains basic navigation in the Space Module of SIMS. See the SIMS User Guide for other instructional SIMS articles.
There are 3 key areas surrounding the grid viewer in the Space module including the following:
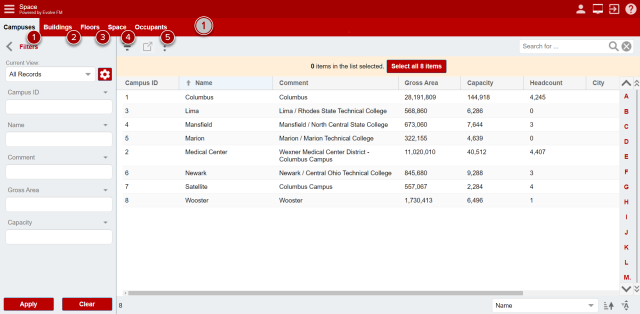
1. Page Bar
The page bar is a horizontal section near the top of the page just below the applications menu icon that shows tabs of the different levels of data that can be viewed. Use the tabs to navigate between the levels of data you’d like to access.
- Campuses – Contains campus level data, including total gross building area at each of the campuses.
- Buildings – Contains building level data, including building number, building name, address, campus, gross area of a building, drawing type, and so on.
- Floors – Contains building floor level data, including floor name and gross square footage of a floor.
- Space – Contains room level data, including room area, room use (Function and Room Type), occupant (Occupant CC and Occupant), owner (Space Allocation), POM assignments, and so on.
- Occupants – Contains employee locations. It is recommended that users use the steps outlined in Searching SIMS for Occupant Data to access data on employee space assignments because this view does not show employees assigned to more than one space.
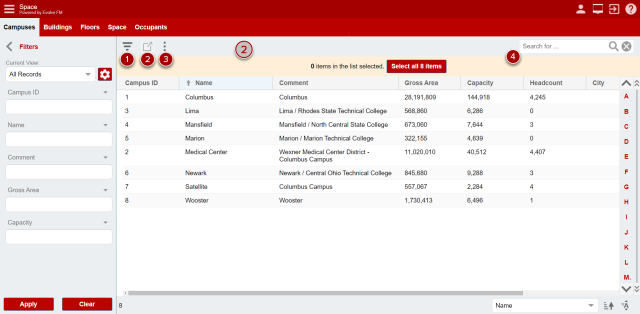
2. Grid Menu
The grid menu is a horizontal section just below the page bar showing icons for different processes.
- Filter Icon – Click to expand and collapse the filter panel.
- Open Icon – Click to view more detailed information about selected record(s).
- More Actions Icon – Click for a flyout menu that allows users to export data to Excel or change the grid display.
- Quick Search – Use to search all fields for the entered string. For example, if you search "Engineering", all records at the selected level with "Engineering" in any field will be yielded.
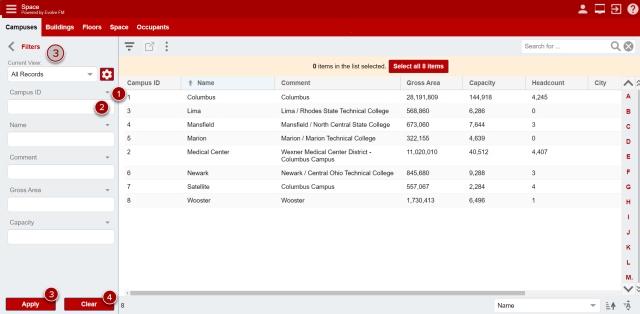
3. Filters Panel
The filters panel is a vertical pane on the left side of the screen when expanded. Click the filter icon in the grid menu to expand and collapse the filter panel. Users can utilize filters to restrict data within a grid. See Advanced Filtering in SIMS for more detailed filtering capabilities.
- Grid Column Selection – This displays the field a filter will be comparing against. These can be changed by clicking the down arrow on the right side.
- Criteria Textbox – This area is where you can input the desired value you’d like to filter on.
- Apply Button – Click Apply to apply the filter inputs to the grid results.
- Clear Button – Click Clear to remove all filter inputs and reset the grid.